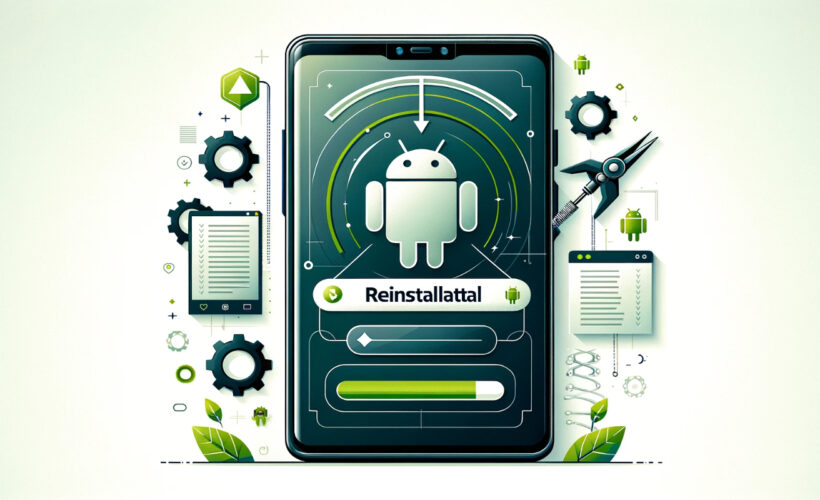
Have you ever felt the creeping dread as your Android device starts lagging, apps begin crashing, and the once-snappy performance dwindles to a crawl? It’s not just frustrating; it’s a full-blown tech nightmare. But fear not, because you’re about to turn the tables on those pesky problems. Imagine hitting the reset button and giving your device a fresh start, free from glitches and sluggishness. That’s the power of reinstalling Android – it’s like a magic wand for your phone’s woes.
How to Reinstall Android? To reinstall Android, back up your data, then boot into Recovery Mode by holding the power and volume buttons. Choose ‘Factory reset’ to wipe data, then ‘Install system update’ to reinstall the OS. For specific devices, download the manufacturer’s firmware and follow their detailed installation guide.
In this guide, we’ll navigate the tech-jungle together, transforming your device from frustrating to flawless. Ready to reclaim your digital life? Let’s dive in!
See Also: How to Pair Raycon Earbuds to Android Phone: Connectivity Guide
Understanding the Basics of Android Reinstallation
Reinstalling Android isn’t just a fancy term tech enthusiasts throw around—it’s a lifeline for your device. Think of it as a ‘fresh install Android’ experience. While a factory reset is like giving your phone a good scrub, a fresh installation is tearing down the walls and rebuilding from the ground up. It’s the difference between a quick clean-up and a full renovation.
When you opt for a factory reset, your device is wiped clean of all your data—photos, apps, that high score on your favorite game—poof, gone! It’s a clean slate, but the operating system (OS) remains the same. It’s like clearing all the clutter from your home but keeping the structure intact.
Reinstallation, on the other hand, is a more in-depth process. It’s not just about starting fresh; it’s about installing a new version of the OS or reinstalling the existing one to address deeper issues. It’s the tech-equivalent of gutting out your space and upgrading the interiors—new paint, new fixtures, the works. This can be particularly handy if your system is corrupted, if you’re dealing with persistent malware, or if you just want to upgrade or downgrade your OS.
So, when you’re at your wit’s end with a device that’s acting up, remember: a factory reset is a quick fix, a temporary solution. But if you’re looking for a transformation, if you want to not just clean but rejuvenate your device, then reinstalling Android is your go-to move. It’s the tech makeover your phone needs to get back to its glory days.
See Also: How to Install Keylogger Remotely on Android Phone?
Preparation Before Reinstallation: The Essential Checklist
Before you dive into the digital deep end and reinstall Android, let’s gear up. Prepping your device is like packing for a vacation; you want to make sure you’ve got everything you need before you leave.
Back It Up: Saving Your Digital Life
First up, backing up your data. It’s the digital equivalent of packing your essentials. You wouldn’t want to leave behind your favorite memories, contacts, or that novel you’ve been typing out in the notes app, right? There are a couple of ways to ensure they’re all safe:
- Cloud Services: Google Drive is your friend here. Sync your photos, documents, and everything else to the cloud. It’s like putting your digital life in a safe deposit box.

- Local Backup: Not a fan of the cloud? Connect your device to a computer and transfer files manually. It’s the old-school road trip of data backup.
- Third-Party Apps: Apps like Titanium Backup can be a lifesaver for rooted devices, backing up not just your apps but their data too.
Power Up: Charge Your Device
This might seem like a no-brainer, but make sure your device is fully charged. Reinstalling Android is no quick pit-stop; it’s a journey. You wouldn’t want your device to power down mid-process. Think of it as making sure you have enough gas to reach your destination.
The Preliminary Checks: Dotting the I’s and Crossing the T’s
- Software Updates: Check if there are any pending updates before you proceed. It’s like checking the weather before you head out. You want optimal conditions.
- Developer Options: Ensure that ‘OEM Unlocking’ is enabled in the developer options. It’s like having the right travel documents.
- Know Your Device: Familiarize yourself with the specific reinstallation process for your device model. Each device is like a different country, with its own set of rules and procedures.
With your data backed up, your device charged, and all the preliminary checks done, you’re ready to embark on the reinstallation journey. It’s like standing at the airport gate, passport in hand, ready to take off. Let’s get that device a brand new start!
See Also: How to Get Free Chips on WSOP Android: Strategies And Tips
Method 1: Navigating the Recovery System
Once you’ve navigated to the ‘Apply update’ option in the recovery menu, you’re at the critical juncture where you’re about to reload the Android operating system. This step is the heart of the process, where you’ll select the specific files to install and effectively reload your device’s OS, giving it a clean slate and potentially enhanced performance.
Embarking on the journey to reinstall Android using your device’s recovery system is akin to an adventure—it requires courage, precision, and a bit of know-how. Let’s start this quest with a step-by-step map to guide you through the mystical lands of buttons and boot menus.
Step 1: The Power Ritual
Begin by turning off your device. It’s the calm before the storm, the deep breath before the plunge. Ensure it’s completely powered down, not just asleep.
Step 2: The Button Combo Incantation
With your device switched off, it’s time to perform the sacred button combination. This varies by device, but it usually involves holding down the “Volume Up” and “Power” buttons simultaneously. For some devices, it might be “Volume Down” or even both “Volume Up” and “Volume Down” along with “Power”.  Hold these until the device logo appears, then release. You’ve now entered the realm of Recovery Mode.
Step 3: The Scroll of Choices
Using the volume buttons, navigate through the options. Think of it as scrolling through an ancient scroll, looking for the right incantation. The power button is your selection wand, confirming your choices.
Step 4: The Wipe Spell
Find and select the ‘Wipe data/factory reset’ option. It’s a powerful spell that will cleanse your device of all its mortal belongings. Confirm your selection and watch as the magic takes place. Remember, this will erase everything, so make sure your treasures are safely stored elsewhere.
Step 5: The Reinstallation Scroll
After the wipe is complete, select the ‘Apply update from ADB’ or ‘Apply update from SD card’ option, depending on where your new OS or the factory image resides. This is the moment where you choose your destiny—will you restore it to its original glory, or will you imbue it with a new essence?
Step 6: The ADB Conjuration (Optional)
If you’re using ADB, connect your device to a computer with a USB cable, as if forging a link between two realms. Open the command prompt on your computer and use the ‘adb sideload <filename>’ command to transfer the new OS to your device. It’s like sending a raven with a message across the kingdoms.
Step 7: The Final Reboot
Once the installation is complete, select ‘Reboot system now’. Your device will take a moment to gather its senses, like a phoenix rising from the ashes, reborn and rejuvenated.
And there you have it—a device restored to its former glory or perhaps even surpassing it. You’ve navigated the recovery system, selected the right spells, and emerged victorious. Your Android device is now a clean slate, ready for new adventures and tales.
See Also: How To Delete BeNaughty Account On Android Phone?
Method 2: The Quest for Manufacturer Firmware
In the quest for stability and performance, sometimes the best route is to go back to the source. Reinstalling Android OS using manufacturer firmware is a trusted method to restore your device to its original state. This involves downloading the official software tailored for your device and using a flashing tool to install it, effectively giving you a clean, manufacturer-approved OS installation.
Reinstalling Android with manufacturer firmware is like embarking on a treasure hunt. You need the right map, the proper tools, and a sprinkle of patience to uncover the riches of a fresh operating system. Let’s set sail on this tech adventure.
Charting the Map: Finding the Right Firmware
Your first step is to locate the treasure—the correct firmware for your device. This is no mere stroll in the park; it’s a crucial part of the journey.
- Visit the Manufacturer’s Website: The most reliable source is the device manufacturer’s own treasure trove. Navigate their support pages or enter the dark caves of the ‘Downloads’ section to find the firmware that matches your device model and number.
- Carrier Websites: If your device is branded by a carrier, check their website too. Sometimes, they have exclusive versions of the firmware tailored for their network.
- Third-Party Sources: There are reputable third-party sites where fellow adventurers have uploaded various treasures. Make sure to verify the credibility of these sites and the firmware they offer.
Gathering Your Tools: The Firmware Installation Kit
Before you begin the installation ritual, you must gather your tools. Here’s what you’ll need:
- Firmware File: The treasure itself, often a .zip or .tar file, ready to be unleashed.
- Device Drivers: Ensure that your computer recognizes your device by installing the necessary drivers.
- Flashing Tool: This is your magic wand. Tools like Odin for Samsung devices or the SP Flash Tool for MediaTek devices are what you’ll use to apply the firmware.
The Installation Ritual: Step by Step
With your map read and tools in hand, you’re ready to begin the installation ritual.
- Install the Drivers: Start by ensuring that your device is recognized by your computer. Install any necessary drivers—this ensures that your device and computer can communicate effectively.
- Prepare the Device: Power off your device completely. Depending on your device, you may need to enter Download Mode or Fastboot Mode. This usually involves a special combination of button presses—like a secret handshake with your device.
- Launch the Flashing Tool: Open the software on your computer—it’s the gateway to installing your firmware.
- Load the Firmware: In the flashing tool, load the firmware file. It’s like loading your bow with an arrow, ready to hit the bullseye.
- Connect the Device: With your device in the correct mode, connect it to your computer via USB. It’s the moment where two worlds collide—the digital handshake.
- Begin the Flashing Process: Hit the ‘Start’ button in your flashing tool and watch as the firmware is magically woven into your device. Do not disconnect or power off your device during this process—it’s the equivalent of disturbing a wizard mid-spell.
- Reboot and Marvel: Once the tool signals that the process is complete, disconnect your device and reboot it. As it powers on, you’ll see the fruits of your labor—a fresh installation, clean and pristine.
Congratulations, brave tech adventurer! You’ve successfully navigated the seas of firmware and installed a fresh version of Android on your device. Your digital ship is now ready to sail into new horizons with a clean bill of health.
See Also: How to Download Melon App on Android: Get Access to K-Pop Hits
Method 3: The Custom ROM Odyssey
Curious about how to install a new Android OS on your device? A custom ROM is your answer. This alternative software can unlock new features and performance improvements. The installation process involves selecting a ROM that’s right for your device, flashing it, and then navigating the exciting new world it offers.
Venturing into the world of custom ROMs is like discovering a secret passage in a castle—it leads to rooms filled with treasures that the standard paths don’t reveal. A custom ROM is not just a different flavor of Android; it’s a whole new culinary experience, crafted by chefs outside of the Android kitchen.
Decoding the Custom ROM Enigma
A custom ROM is essentially a fully standalone version of the Android OS designed by third-party developers. It’s like getting a bespoke suit—tailored to fit your style, as opposed to off-the-rack options. These ROMs can breathe new life into older devices, offer more customization, and sometimes even improve performance and battery life. They’re the rebels of the Android world, breaking free from the factory settings to offer something unique.
The Treasure Hunt: Finding Your Perfect ROM Match
Before you can enjoy the spoils, you must embark on the quest to find the right ROM for your device. Here’s how:
- Research: Start by visiting forums like XDA Developers, where the Android elite gather to share their ROMs. It’s like a roundtable of knights, each with their own coat of arms.
- Compatibility: Ensure the ROM is compatible with your device model. Flashing the wrong ROM is like trying to fit a square peg in a round hole—it just won’t work.
- Reputation: Look for ROMs with a good reputation and active support. The best ROMs are those backed by a community of developers, constantly refining their craft.
The Installation Ceremony
Once you’ve found your ROM, it’s time to install it. This process is for the brave—it’s the digital equivalent of a knight donning armor.
- Unlock the Bootloader: This is the gateway to your device’s heart. It must be unlocked to allow the installation of a custom ROM. Be warned, this can void your warranty and erase your data, so back up first!
- Install a Custom Recovery: Tools like TWRP or ClockworkMod are your allies here. They replace your device’s default recovery mode with something much more powerful.
- Download the ROM: Securely download the ROM and corresponding GApps package if you want access to Google services.
- Boot into Recovery Mode: With your device off, use the special button combination to enter Recovery Mode.
- Wipe the Old Data: Perform a factory reset from the custom recovery to ensure a clean slate for your new ROM.
- Flash the ROM: Select the ‘Install’ option in the recovery, find your ROM file, and swipe to confirm the flash. It’s like laying the foundation stone of a castle.
- Flash GApps (Optional): If you want Google’s suite of apps, now’s the time to flash the GApps package.
- Reboot and Revel: Once the flashing is complete, reboot your device. The first boot may take longer than usual, but patience is a virtue.
As your device springs to life, you’re greeted with a new realm of possibilities. Custom ROMs offer a playground for customization, performance tweaks, and features that standard ROMs may not provide. You’ve not just installed a new version of Android; you’ve tailored your device to your personal preferences. Welcome to the world of custom Android experiences!
Troubleshooting Common Issues During Reinstallation
If you encounter issues during the process and find yourself pondering ‘how to reload Android OS’ when things don’t go as planned, remember to check for common errors like incorrect firmware versions or interrupted update processes. These can often be resolved by double-checking compatibility and ensuring a stable connection during the reload.
Even the most seasoned adventurers can encounter dragons on their quest. When reinstalling Android, you might bump into a few technical beasts. Fear not! Here’s how to tame them and when to call in the knights of the tech realm for backup.
Facing the Beasts Head-On
- Stuck on the Boot Screen: If your device is stuck in a boot loop, it’s like being caught in a sorcerer’s spell. Break it by entering Recovery Mode and performing a factory reset. If that doesn’t work, you may need to reflash the firmware.
- Installation Aborted Error: This message can pop up like an unexpected cliff on your path. It often means the firmware file is corrupted or incompatible. Redownload the firmware or choose a different file and attempt the journey again.
- Device Not Recognized by PC: Like a drawbridge that won’t lower, this issue can halt your progress. Check your USB cable, try different ports, or reinstall device drivers to establish a connection.
- Insufficient Storage Error: Encountering this is like finding your pack too full on a hike. Clear some space by deleting unnecessary files in Recovery Mode, or try a smaller firmware package.
When to Summon the Wizards of Tech Support
- Persistent Boot Loops: If after multiple attempts and different methods, your device still won’t start, it’s time to seek a professional. It could be a sign of deeper hardware issues.
- No Recovery or Download Mode: If you can’t access these essential modes, it’s like finding the gates to the castle locked tight. This situation often requires expert intervention.
- Severe System Corruption: When your device’s firmware is as corrupted as a dark lord’s heart, and nothing seems to cleanse it, professional technicians have the tools and spells needed to delve deeper into the system.
Remember, while many issues can be resolved with patience and the right knowledge, there’s no shame in seeking help. Sometimes, the bravest thing a hero can do is call for reinforcements. So, if you find yourself outmatched by the technical beasts, reach out to the customer support of your device’s manufacturer or a trusted tech repair service. They’re the knights in shining armor for your tech troubles.
See Also: How to Download Love Live Japanese Version on Android: Tutorial
Post-Reinstallation: First Steps
Congratulations! You’ve successfully reinstalled Android and your device is as fresh as a morning breeze. But before you leap back into the digital fray, there are a few critical first steps to ensure your device is not only running but sprinting with finesse.
Setting the Stage: The Initial Setup
- Language and Connectivity: Upon booting up, you’ll be greeted with the welcome screen. Here, select your language and connect to Wi-Fi. It’s like choosing the right gear and checking your map before a hike.
- Google Account: Sign in to your Google account. This step is like sending a raven to announce your return to the kingdom; it lets your apps and services know you’re back.
- Device Configuration: Go through the initial device setup. This includes setting up your time zone, fingerprint or face recognition, and any other personalization settings. It’s akin to hanging your banners and setting your throne just right.
Restoring Your Kingdom: Data Restoration
- Restoring from Backup: If you backed up your data to Google Drive or a local backup, now’s the time to restore it. Navigate to your backup tool of choice and begin the restoration process. It’s like refilling your castle’s treasury with the gold and jewels you saved.
- Checking App Functionality: As your apps repopulate your device, open them to ensure they’re working correctly. It’s like checking that all the locks and traps in your castle are functional.
- Updating Apps and System: Head to the Play Store and run any pending app updates. Then, check for system updates in your device settings. Keeping everything up-to-date is like reinforcing your castle walls.
Verifying the Integrity of the Installation
- Performance Check: Keep an eye on your device’s performance over the next few days. Are there any hiccups in speed? Any apps misbehaving? It’s like watching for signs of dragons or invaders on the horizon.
- Battery Life: Monitor your battery life. A new installation should give you optimal battery performance. If it drains faster than a lake during a drought, there might be an issue worth investigating.
- Error Logs: For the tech-savvy, a glance at the error logs can reveal a lot. It’s like consulting the oracles to ensure no curses were cast during your absence.
By following these steps, you’re not just turning the key and walking into your home; you’re ensuring that every nook and cranny is just as you left it, if not better. With a device that’s set up correctly and data restored, you’re ready to march into the digital world with confidence. Your Android device is now a fortress of productivity and entertainment, standing tall and proud in the landscape of technology.
Maintaining Your Android Device Post-Installation
Think of your newly reinstalled Android device as a garden; it needs regular tending to flourish. Here are the green-thumb tips to keep your digital flora thriving:
Regular Updates: The Pulse of Your Device
- System Updates: Just like a gardener checks the weather, keep an eye out for system updates. They’re the sunshine and rain to your device’s ecosystem, providing vital security patches and feature enhancements.
- App Updates: Keep your apps updated. Developers are like gardeners, constantly pruning and improving. Regular updates mean fewer bugs and better performance.
Backups: Your Safety Net
- Cloud Backups: Set up a routine cloud backup. It’s like storing seeds for the next season; if something goes awry, you can always replant.
- Local Backups: Occasionally, do a local backup to a PC or an external drive. It’s the equivalent of having a shed to store your tools and surplus.
Performance Checks: The Regular Weeding
- Monitor Performance: Keep an eye on how your device behaves. A sudden slowdown could be the digital equivalent of weeds; it might be time to clear the cache or manage your storage.
- Battery Health: Like checking for pests, monitor your battery health. Unusual drainage might indicate a power-hungry app or the need for battery replacement.
Security: The Fence Around Your Garden
- Install Security Software: Consider a reputable security app to keep the digital pests at bay.
- Be Cautious: Just as you wouldn’t let a stranger into your garden, be wary of the apps you download and the links you click.
By following these tips, you’ll ensure that your Android device remains a lush landscape of productivity and reliability. Regular maintenance is the key to a long and fruitful digital life.
FAQs
Can I reinstall Android by myself?
Yes, you can reinstall Android by yourself using a PC and tools like DroidKit, performing a hard reset, or flashing a custom ROM, depending on your technical comfort level.
Will reinstalling Android OS delete my data?
Reinstalling Android using a PC or flashing a custom ROM can often preserve your data, but it's always best to back up beforehand. A hard reset will typically erase all data.
How do I reinstall Android without a computer?
To reinstall Android without a computer, you can perform a factory reset directly from your device's settings or recovery mode, which will reinstall the OS that came with your phone.
How long does it take to reinstall Android?
The time it takes to reinstall Android can vary. Using a PC might take a few minutes to download the firmware, while a hard reset or flashing a ROM could take up to an hour.
Can reinstalling Android improve device performance?
Yes, reinstalling Android can improve device performance by resolving system glitches, updating to the latest OS version, and removing any corrupt files.
Conclusion: The Journey’s End and a New Beginning
As we draw the curtains on our guide to reinstalling Android, let’s take a moment to bask in the glow of accomplishment. You’ve traversed the path from preparation to reinstallation, tackled the potential dragons of troubleshooting, and emerged victorious with a device that’s as good as new.
Remember, the reinstallation of Android is more than just a fresh start; it’s a canvas for personal expression. With your device restored, the horizon of customization beckons. Dive into the world of launchers, widgets, and settings that can tailor your digital experience to your unique style and needs.
Embrace this new beginning, explore the vast landscapes of the Android ecosystem, and let your device be a reflection of your personal tech flair. The tools and knowledge you’ve gained here are just the beginning. Your Android device is a companion on this digital adventure, and you’re the navigator. Set forth and make it truly yours.
See Also: How to Cancel FitCoach Subscription on Android: A Guide

Jordan is the Phones Editor for WantedTech, covering all things phone-related. He’s written about phones for over five years and plans to continue for a long while to come. He loves nothing more than relaxing in his home with a book, game, or his latest personal writing project. Jordan likes finding new things to dive into, from books and games to new mechanical keyboard switches and fun keycap sets. Jordan tends to lurk on social media, but you can best reach him on Twitter.