
Imagine you’re on the brink of completing that perfect design in Cricut Design Space on your Android device, only to find the edges of your cutout are as jagged as a mountain skyline. It’s frustrating, isn’t it? You’ve invested time and creativity, yet the final product is far from the crisp, clean lines you envisioned. This isn’t just a minor hiccup; it’s a glaring roadblock that can diminish the quality of your work, making it look unprofessional and hastily put together.
How to Smooth Edges in Cricut Design Space on Android? To smooth edges in Cricut Design Space on Android, use the “Edit” tool to select your image, then tap “Actions” > “Hide Contour.” Choose the lines you want to smooth, and they’ll disappear, leaving a cleaner edge.
But here’s the kicker: the solution is simpler than you might think. With a few taps and swipes on your Android device, you can transform those rough edges into the smooth, sleek lines that your design deserves. No more settling for less than perfection. Let’s dive into the how-to and turn your design woes into wows.
See Also: How to Share Camera Between Two Android Phones Without Internet?
Understanding the Basics of Cricut Design Space on Android
Cricut Design Space is a companion app that lets you design and wirelessly cut with Cricut Explore and Cricut Maker machines. Created with simplicity in mind, it’s a one-stop shop for crafting enthusiasts. Whether you’re a seasoned pro or just starting, the app’s user-friendly interface ensures your creative process is as smooth as the cuts your Cricut machine makes.
Now, let’s talk about the desktop and Android versions. While both platforms share core functionalities, the Android app is tailored for on-the-go convenience. The desktop version boasts a full-screen workspace, ideal for intricate designs, and offers a more extensive suite of tools due to the larger processing power of computers. In contrast, the Android app is optimized for touch controls, making it intuitive to move, resize, and adjust elements with just your fingertips. However, this means some advanced features might be simplified or not present in the mobile version.
Understanding these differences is key to maximizing the potential of Cricut Design Space, regardless of your device. So, grab your Android tablet or phone, and let’s get those creative juices flowing as we delve deeper into the world of precision crafting!
See Also: How to Root Samsung A12 Android 11: Unlocking Full Potential
Preparing Your Image for Upload
Before you even tap into the Cricut Design Space on your Android, the groundwork for a flawless design begins with preparing your image. Choosing the right format is like picking the perfect paper for a masterpiece painting – it sets the stage for everything that follows.
Start with a high-resolution image; think of it as the raw material for your design. PNGs are the gold standard here, thanks to their transparent backgrounds, making them a breeze to work with. JPEGs can work too, but remember, they come with a background that you might need to remove later. And if you’re feeling adventurous, SVG files are like the VIP pass in Cricut’s world – they come ready to cut and scale without a hitch.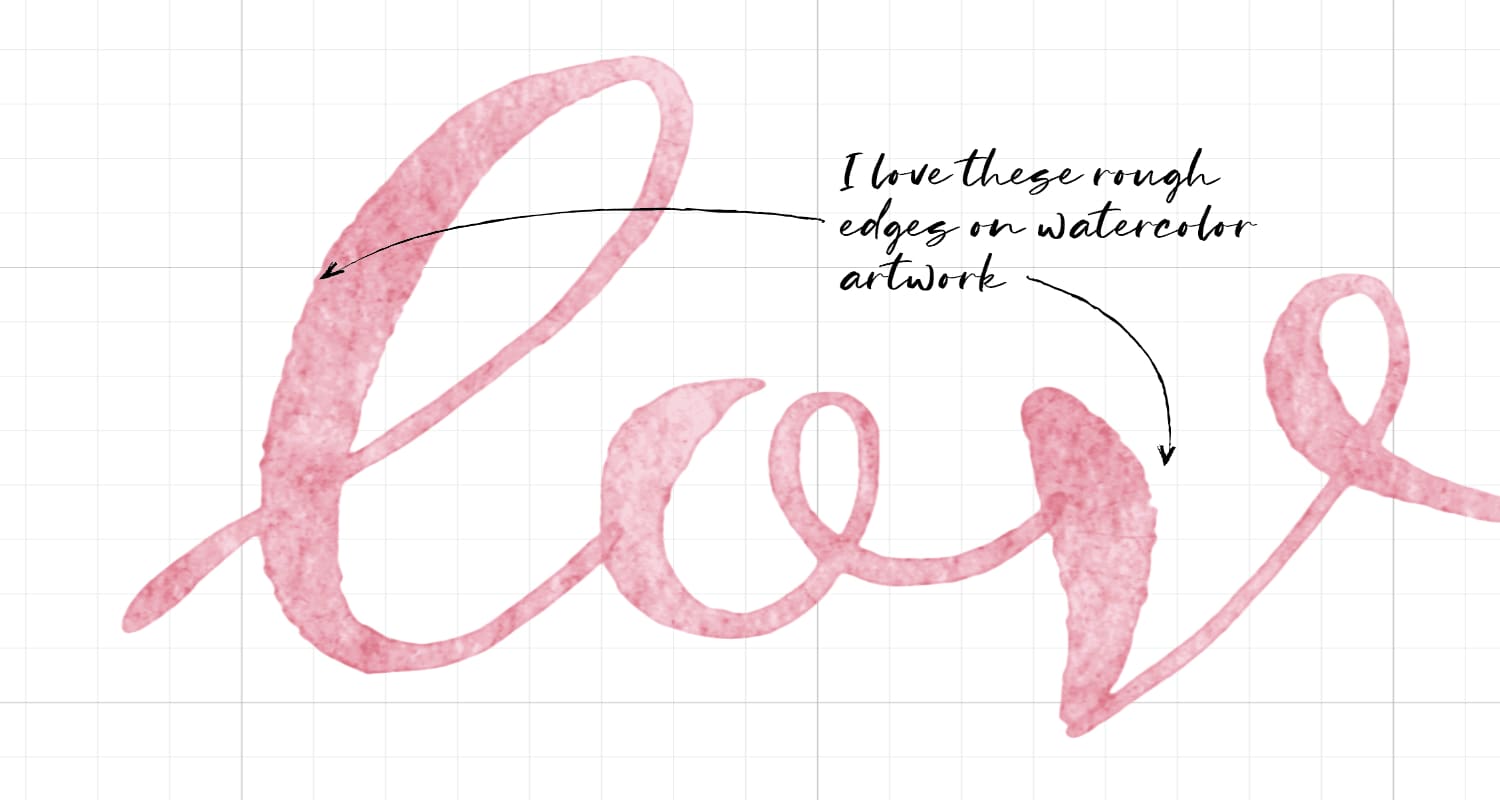 Now, let’s talk pre-editing – your secret weapon to ensure those edges are as smooth as silk when it’s showtime. Use an image editing app to remove any unnecessary clutter and to tweak the contrast. A stark difference between your design and its background helps Cricut’s magic wand – the “Select & Erase” tool – to work more effectively.
Consider using filters to sharpen the image and enhance edges. This isn’t just about aesthetics; it’s about precision. The sharper your image, the less work you’ll have to do in Design Space to get those lines just right.
And here’s a pro tip: zoom in. Those tiny imperfections invisible to the naked eye? They’ll stand out when you’re up close and personal, giving you the chance to fix them before Cricut ever lays its blade on your material.
By following these steps, you’re not just preparing an image for upload; you’re setting the stage for a masterpiece that’s as precise as it is beautiful. So choose wisely, edit smartly, and watch as your design goes from digital to delightful with ease.
See Also: How to Reinstall Android: Revive Your Device With These Steps
Step-by-Step: Smoothing Edges in Cricut Design Space
Embarking on the journey of smoothing edges in Cricut Design Space on your Android device is like setting sail on a voyage of creative discovery. Here’s your map and compass to navigate through the process.
Step 1: Uploading Your Image
How to clean up jagged edges in Cricut design space? Begin by launching the Cricut Design Space app on your Android device. Tap on the canvas to start a new project and select ‘Upload’. Here, you can choose to take a photo or browse your gallery for the perfect image. Once you’ve selected your image, the app will prompt you to clean it up. Use the ‘Remove’ tool to click on the areas you want to disappear, like the background or any unwanted elements. This step is crucial – think of it as decluttering your workspace before the real magic happens.
Step 2: Selecting and Erasing Unwanted Parts
With your image uploaded, it’s time to refine. The ‘Select & Erase’ tool is your best friend here. It’s designed to remove the bits you don’t need, like rogue marks or blemishes that could disrupt your smooth edges. Tap on the parts you want to erase, and like a digital eraser, they’ll vanish, leaving behind only what you need. Be patient and precise – the beauty is in the details.
Step 3: Adjusting the Image
How to smooth edges in Cricut design space on the computer? Now, let’s get those edges crisp. The ‘Erase’ tool allows you to manually smooth out any jagged lines, while the ‘Crop’ tool lets you cut down your image to the exact size you need. Use a steady hand and a keen eye to trim any excess, ensuring every curve and corner is just as you envisioned. Remember, it’s not just about subtraction; it’s about sculpting your design to perfection.
Step 4: Previewing and Refining
After the adjustments, it’s time for a close inspection. Preview your image to ensure every edge is smooth and every line is sharp. If you spot any areas that need a touch-up, the ‘Edit’ tool is your go-to. It allows you to go back and make those fine-tune adjustments, ensuring your design is ready for the spotlight.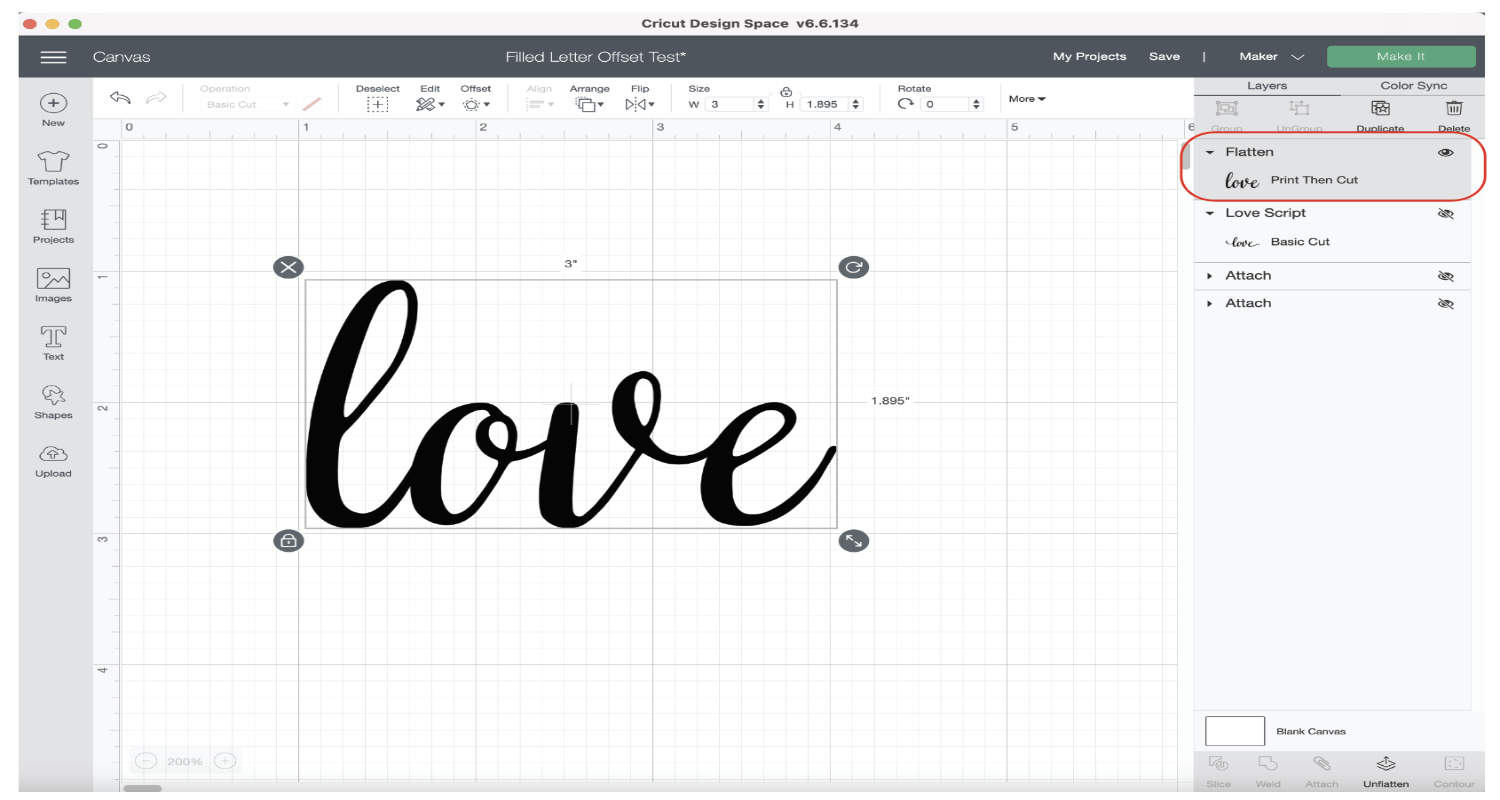
Throughout this process, keep in mind that each step is an opportunity to refine and perfect. Don’t rush – good art takes time, and great art takes patience. With each tap and swipe, you’re not just smoothing edges; you’re bringing your vision to life, ensuring that when it’s time to cut, your design is nothing short of impeccable.
See Also: How to Pair Raycon Earbuds to Android Phone: Connectivity Guide
Advanced Tips for Smoothing Edges
Navigating the nuanced terrain of Cricut Design Space on Android requires a blend of creativity and technical know-how, especially when it comes to the art of smoothing edges. Advanced users, buckle up; it’s time to master the Contour function, your precision tool for creating the sleekest of lines and the smoothest of edges.
Mastering the Contour Function
The Contour tool is the scalpel in your digital toolkit, allowing you to slice away unwanted cut lines with surgical precision. To access it, select your image and tap ‘Actions’. Here, you’ll find ‘Hide Contour’—a gateway to refining your design. Once you’re in, you’ll see your image and a palette of lines representing potential cuts. It’s your call which lines stay and which ones go. Tap a line, and it fades, effectively telling your Cricut machine, “Let’s not go there.” This is where you turn good into great, ensuring that every cut reflects your intention.
Navigating the Hide Contour Window
How to smooth edges in Cricut design space on PC? The Hide Contour window is like a map of your design’s topography. Each line is a path you can choose to follow or not. As you tap and lines fade, you’re not just editing; you’re envisioning the final product. This window is your playground for experimentation. Play with different combinations of visible and hidden lines to see how your design evolves. It’s a process of discovery, leading you to the smoothest edges your project demands.
Restoring Hidden Contours
But what if you change your mind? Flexibility is your friend here. To bring a line back into the game, simply tap it again in the Hide Contour window. It’s like saying, “I missed you, let’s bring you back into the fold.” This isn’t just an undo button; it’s a way to iterate and evolve your design until every line serves a purpose.
In the world of Cricut, smooth edges are a hallmark of craftsmanship. They’re the difference between a project that’s merely done and one that’s done with finesse. By mastering the Contour function and the Hide Contour window, you’re not just editing images; you’re sculpting them into their final, flawless form. And should you ever need to backtrack, restoring hidden contours is a tap away, ensuring that your creative process is as fluid as the designs you create.
See Also: How to Install Keylogger Remotely on Android Phone?
Common Issues and Solutions
In the realm of digital design, particularly when finessing the details in Cricut Design Space on Android, you may encounter a few common gremlins that can make your edges less than smooth. Fear not, for every problem has a solution, and ensuring clean, crisp lines is all about knowing the tricks to troubleshoot these pesky issues.
Troubleshooting Jagged Edges
Cricut cutting jagged edges: Jagged edges often rear their ugly heads when the image quality is less than ideal. To combat this, always start with the highest resolution image possible. Think of it as giving your Cricut the best ingredients for a gourmet meal. If you’re already past that point, use the ‘Smooth’ tool within the app to soften those serrated lines. It’s like using a fine-grit sandpaper to gently polish away the rough edges of your design.
Ensuring Clean Lines
Clean lines are the holy grail of cutting projects, and achieving them is a matter of precision editing. Zoom in—way in—on your image in the Design Space. This will allow you to spot any potential problem areas that you can’t see at a standard view. Once identified, use the ‘Erase’ tool to manually remove any stray marks or blemishes that could disrupt your sleek silhouette.
Dealing with Complex Images
Complex images with lots of details can be particularly challenging. In these cases, simplifying the image may be your best bet. Use the ‘Contour’ function to eliminate unnecessary cut lines, or break down the image into simpler sections and tackle each one individually. This methodical approach can transform a daunting task into a series of manageable steps.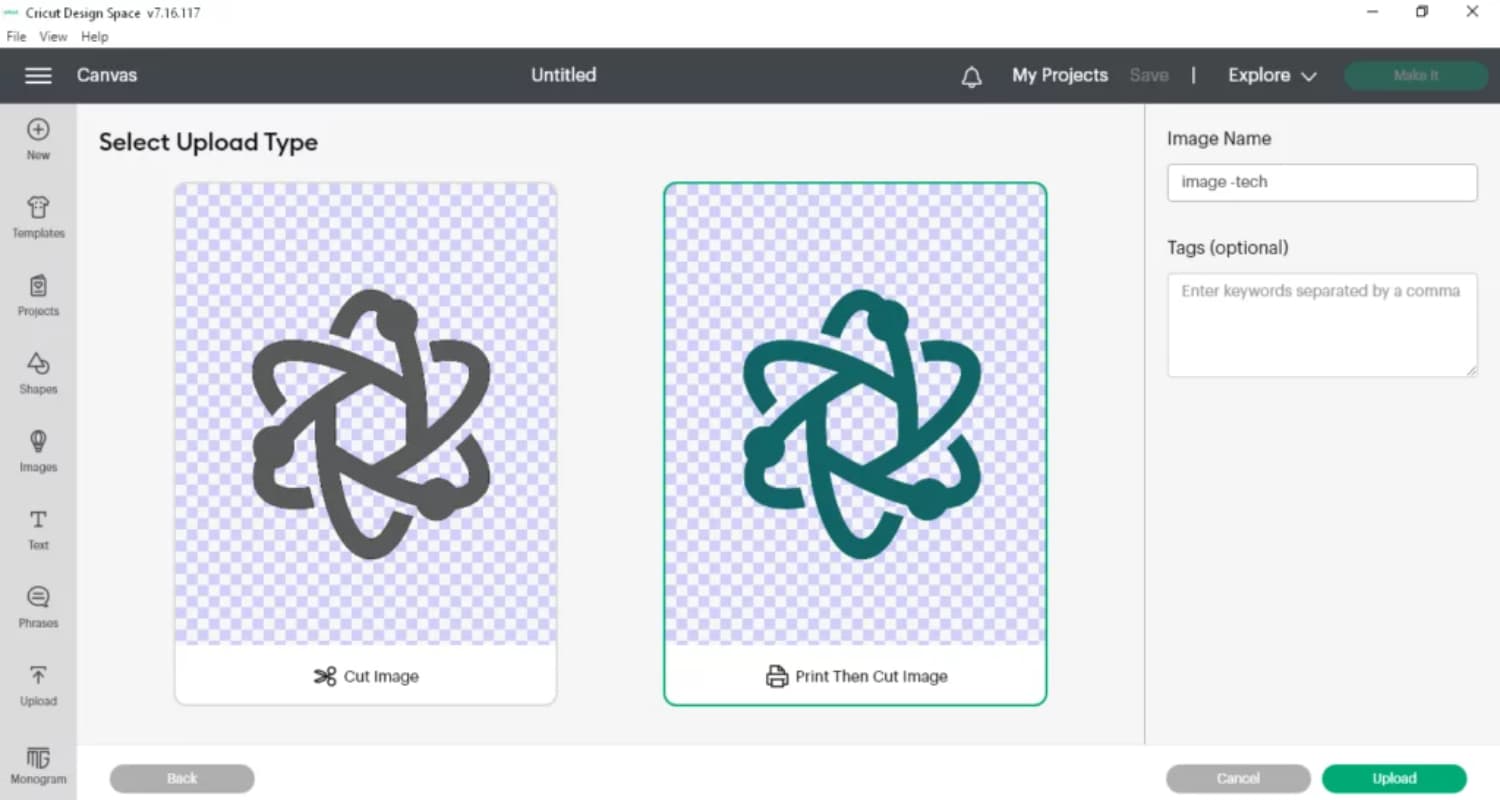
Remember, patience is your ally in ensuring perfection. Rushing through the smoothing process can lead to mistakes, so take your time. With each adjustment and refinement, you’re not just solving problems; you’re crafting a piece that stands out with its professional, polished look. So, embrace the challenges as part of the creative journey, and watch as your designs come to life, free of imperfections and full of potential.
See Also: How to Get Free Chips on WSOP Android: Strategies And Tips
Saving and Managing Your Projects
In the digital crafting world, saving and managing your projects in Cricut Design Space is akin to keeping a tidy workshop; it’s essential for efficiency and ease of access. Here’s how to ensure your designs are not just saved, but also well-organized on your Android device.
Best Practices for Saving Your Work
As you wrap up your design, tap the ‘Save’ button with a sense of accomplishment. Give your project a clear and descriptive name, making future retrieval a breeze. Think of it as labeling a file cabinet — specificity is key. Opt to save your work to the cloud, ensuring that you can access it from any device, anytime, anywhere. This is your creative safety net, protecting against lost work due to unexpected interruptions or device issues.
Managing Files Within the App
Organization is your secret weapon in managing files within the app. Cricut Design Space allows you to categorize projects into folders. Use this feature to your advantage by creating folders based on project type, date, or any system that suits your workflow. This way, when inspiration strikes again, you’re not sifting through a cluttered digital pile; you’re selecting from a well-curated collection of your own making.
By following these simple yet effective strategies, you’re not just saving your work; you’re setting up a foundation for ongoing creativity and productivity. Your future self will thank you for the time saved and the frustration spared when you can jump back into a project without missing a beat.
See Also: How To Delete BeNaughty Account On Android Phone?
FAQs
Can I use Cricut Design Space on my Android device?
Yes, Cricut Design Space is available for Android devices and can be downloaded from the Google Play Store.
How do I upload images to Cricut Design Space on Android?
Open the app, start a new project, tap 'Upload', and select an image from your device or take a new photo.
What image format is best for Cricut Design Space?
PNG is preferred for its transparent background, but JPEG and SVG files are also compatible.
How can I smooth edges of my design in Cricut Design Space?
Use the 'Edit' tool to select your image, then 'Actions' > 'Hide Contour' to smooth edges.
Can I save my Cricut Design Space projects on Android?
Yes, you can save your projects within the app and access them across devices via cloud storage.
Conclusion
And there you have it, a complete expedition through the twists and turns of smoothing edges in Cricut Design Space on your Android. From choosing the right image format to mastering the Contour function, each step is a building block towards impeccable designs. Remember, every great artist was once a beginner; practice is your path to perfection. So, keep experimenting with those advanced features, and don’t shy away from complex projects. With each swipe and tap, you’re not just crafting; you’re growing as a designer. Now, go forth and create with confidence, knowing that smooth edges are just a design space away.
See Also: How to Download Melon App on Android: Get Access to K-Pop Hits

Valentina has covered consumer electronics for a number of publications including Wired, Laptop Mag and Ars Technica, with a particular focus on wearables, PCs and other mobile tech. She studied journalism and English at Syracuse University, and has been curious about tech ever since she was a little girl. How she convinced her parents to let her have a PalmPilot at eight years old, she’ll never know.